I fired up my software and picked a nice slice from the 'Goldberg Sphere'. The resin cured within seconds! Good progress so far. The next step was to test the adhesion (or hopefully lack of adhesion) to my polycarbonate resin build tray. I used a silicone spray and paper towel to grease up my build tray, and I place a small amount (few drops) of resin on the tray to be exposed.
The remains of my first build tray.
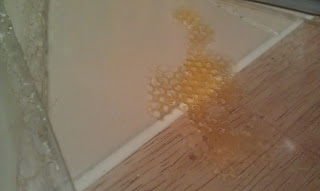
Unfortunately, The resin firmly adhered to the build tray. No amount of coaxing could remove it. I decided polycarbonate might not be the best choice, or I might have to use a thin film of Teflon coating on the polycarbonate. Either way, this build tray was toast.
Shown here is the resin stuck to the tray.
I found a nice small pane of soda glass I had been saving, and re-tried with a few more drops on an un-coated pane. Even un-coated, the resin did not adhere very well to the glass. I was able to slide a few test prints off the pane.
Some test object slices of the 'Goldberg Sphere'
New build tray
I used some aluminum channel stock I had lying around along with the glass pane to construct a new build tray of the proper size. I used silicone sealant on all bottom edges and the corners to ensure a proper watertight seal.
I think this new build tray will do the trick. The last thing I need to do is finish the arm that connects to the ZAxis and dips into the resin. I've already added a leveling system to the bottom of the build tray on the printer. I may have to add a small leveling system (some screws) to the build arm.


No comments:
Post a Comment