Pages

Tuesday, March 26, 2013

An update

So, I haven't made a blog posting for a while, but it's not because of lack of progress. Progress continues on my Slicing and building software https://github.com/Pacmanfan/UVDLPSlicerController .The main issue that I'm facing right now with my UV DLP Printer is the resin sticking to the bottom of the vat. The UV light cures the resin, and it adheres fairly well to the glass bottom of the build tray as well as the build arm platform. 
 The problem happens when the arm (and platform) try to lift the slice up. The printed resin slice is too firmly attached to the glass bottom of the vat, and the resin releases from the build arm platform instead of the vat platform. I've tried roughing up the bottom of the build arm platform for better adhesion, as well as greasing up the glass vat with silicone lubricant. No luck so far.
   Other designs I've seen use a mechanism for sliding and/or tilting the build vat. This allows the interface between the resin and the bottom of the vat to release suction before/during the lift sequence. 

One problem that I'm facing now is that my vat is fairly large, and I don't have room on the surface of my printer to add in a tilt/slide mechanism easily. The reason my vat is so large is because I didn't modify my projector optics for a shorter throw distance. I suppose the "ideal" throw distance would project the 1024x768 resolution of the projector onto a 102 x 77mm area on the bottom of the vat for a 10 pixels per mm resolution. My projector's minimum throw distance is a little longer, giving me a size of approximately 155 x 120 mm. This is fine by me, however; if I want to add in a tilt mechanism, I may have do one or more of several things:
 1) Adjust the projector throw distance to be shorter, so I can have a smaller vat, and more room for a slide/tilt mechanism on my existing machine.
2) Rebuild my machine with a larger top surface for additional space for the tilt/slide
3) Completely rebuild my machine - Now to be fair, I was thinking about doing this anyways. I want to have a smaller design that uses a horizontally mounted projector and a mirror to project the image to the surface of the bottom of the vat.

Well, I should just choose an option and stop stalling so I can get up and printing. 
On some good news, several people have reported to me that they've used my software along with their printers to successfully print!

I'm still in the process of adding more functionality to my application. Look for some good new features real soon.

-Steve

Thursday, March 7, 2013

Resin tray rebuild and UV Resin testing.

Last week, I purchased some UV resin specifically designed for 3d printing from 3DInk http://buy3dink.com/p/59/uv-resin . It arrived yesterday and I immediately started conducting a few print tests. One of the first things I noticed is that the resin was much less viscous than the SolarEZ resin I tried before. The 3DInk resin flowed almost like water. Again, I put a few drops in a sandwich bag and placed it on my resin tray.

I fired up my software and picked a nice slice from the 'Goldberg Sphere'. The resin cured within seconds! Good progress so far. The next step was to test the adhesion (or hopefully lack of adhesion) to my polycarbonate resin build tray. I used a silicone spray and paper towel to grease up my build tray, and I place a small amount (few drops) of resin on the tray to be exposed.
The remains of my first build tray.

Unfortunately, The resin firmly adhered to the build tray. No amount of coaxing could remove it. I decided polycarbonate might not be the best choice, or I might have to use a thin film of Teflon coating on the polycarbonate. Either way, this build tray was toast. 

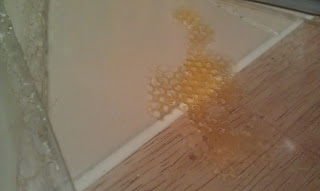
Shown here is the resin stuck to the tray.


I found a nice small pane of soda glass I had been saving, and re-tried with a few more drops on an un-coated pane. Even un-coated, the resin did not adhere very well to the glass. I was able to slide a few test prints off the pane.

Some test object slices of the 'Goldberg Sphere'

New build tray

I used some aluminum channel stock I had lying around along with the glass pane to construct a new build tray of the proper size. I used silicone sealant on all bottom edges and the corners to ensure a proper watertight seal.


I think this new build tray will do the trick. The last thing I need to do is finish the arm that connects to the ZAxis and dips into the resin. I've already added a leveling system to the bottom of the build tray on the printer. I may have to add a small leveling system (some screws) to the build arm.


Friday, March 1, 2013

Exposure Tests


I ran some exposure tests last night. I placed a small amount of UV resin into a plastic sandwich bag and laid it flat on the Resin tray. I went to a middle layer slice of a model slice and I let the resin expose for approximately 30 seconds.
Exposing the Resin to the projected image

As you can see, the resin set into the slice of the projected image. Exposure time took longer than I thought it would, and the resultant piece was still very soft and rubbery. I think I'm using a non-optimal UV resin for this printer. (I bought a quart over 2 years ago from www.solarez.com that was meant for surfboards). I need to bite the bullet and invest in a small quantity of of resin that is specifically designed for 3d printing.
The resultant created object.

If anyone knows of a site where I can purchase a small (quart or liter size) amount of UV resin specifically designed for 3D printing, please let me know.