Pages

Monday, April 7, 2014

Mill conversion

So after running into a little money, I picked up a cheap Chinese mill from Ebay, it's a CNC 3040. Mills like this are built with a parallel port for interfacing with desktop computers under programs like Mach3.


After verifying the hardware was fully functional, I decided to do a little 'upgrading'. I wanted to be able to run this mill off of my "Creation Workshop" software, so I took the time to build an interface cable to plug the DB25 connecter of the parallel port to connect directly to an Arduino board. This Arduino is running a fairly stock version of the 'Sprinter' firmware.


After a little tweaking and configuring a new profile in Creation Workshop, I was able to run a few GCode files on the mill.

As far as Creation Workshop goes, I have been building lots of new versions and adding new features recently. Instead of posting new versions on github, I've been posting to my forum www.buildyourownsla.com for better visibility and faster turnaround.

Monday, February 17, 2014

New DLP build started! / Pico-projector part 3

I keep saying this, but it's been too long a time since I updated my project blog. It's not for the lack of progress mind you. Things have been very busy for me lately. I'm not sure if I mentioned it before, but I started a new forum dedicated to all things DLP/SLA www.buildyourownsla.com . I have to say, never expected the explosion of interest! It's only been up for less than 2 months, but there are hundreds of active users (and about 1000 spammers).

Creation Workshop http://www.envisionlabs.net/ continues to advance rapidly, largely due to the herculean efforts of the co-programmer Shai (Thanks man!) . I've had a lot of interest with DLP/SLA printer manufacturers wanting to distribute Creation Workshop along with their printers, and I've been signing them on rapidly. I've devised a plug-in system that allows me to create vendor plug-ins to completely customize the GUI and code for each machine. It also allows me to distribute custom machine and slicing profiles tailored to each machines unique capabilities.

I've been talking with a bunch of groups/ start-ups/ companies about their machines for months, and I'm in a pretty unique position to see exactly what's going to be coming out on the market this upcoming year. I'm under NDA with a few of them, so let's just say that 2014 will be the rise of the SLA machine in the 3d printing world.

That all being said, I've been giving some thought as to how to create the 'Best' machine possible. 'Best' is an arbitrarily chosen words really. 'Balanced' would be a better descriptor. As I noted elsewhere http://www.buildyourownsla.com/forum/viewtopic.php?f=17&t=149 , there will always be tradeoffs between build size, resolution, and print speed. I think I've come upon a good balance between the 3.

What I came up with is a pico-projector mounted on an x/y linear assembly. The projector can expose smaller image tiles on a much larger vat bottom. This allows the pico-projector to maintain a 25micron (or greater) x/y resolution. The vat can be arbitrarily large. This is a good trade-off between size and print speed.

I'm still in the early stages of the build, but it's all coming along nicely.
New parts for the build
Shown above are a few parts I'm using for the build. Here's an incomplete BOM of items so far:
  • 12v 6A power supply
  • 5x Nema 17 steppers (I'll probably use 4)
  • 12x LMU88 linear bearings
  • 6 meters of GTK belt and 4 pulleys
  • 10W UV LED 405nm on an alum heatsink
  • Modified AAXA P2JR DLP projector
  • 3' of 1/8 hose for the resin pump
  • 3 prong outlet
  • Mains switch
  • Printed 3 way corner brackets for the 80/20 construction
  • 4 printed feet


A bunch of 350mm and 300mm 25mm 80/20 aluminum.


The constructed bottom portion of the machine. Measures 350x350mm.

I'm still waiting on a few more parts in mail:

  • Arduino 2560 with RAMPs board
  • 8mm hardened steel rails
  • 8mm threaded rod
  • UV transmissive plexiglass for the vat
  • UV blocking plexiglass for the outer casing/window
  • Other things I forgot

I'm probably going to do a bit more construction today. Look for the next part of this build soon.
-Steve


Tuesday, December 17, 2013

UV DLP Pico Projector Experiments Part 2

I know I left many of you hanging with my part 1 of the pico-projector experiments. To recap from part 1, I had successfully dis-assembled my pico-projector & examined the optic path, trying to determine how to insert a 10W UV LED into it all.

First, I'd like to offer a few words of caution. UV light can and will hurt your eyes. This is the exact reason why welders wear goggles. Sunburn on your eyes is no joke. I highly recommend wearing a good pair of sunglasses, or welding goggles if you have them.
Safety First...
 Last I posted, I was pointing out various bits of the optic path, and what they do. Shown below is a top-down view of the optic path of the axaa p2jr projector. http://www.aaxatech.com/products/p2jr_pico_projector.html

The L-Bracket with the LEDs has been removed.


 Initially, my efforts focused on attempting to collimate the light from a 10W LED into the existing port from one of the removed LEDs. The 10W UV LED I had purchased from Ebay had a 3x3 grid of individual LEDs. The actual emitter portion measured approximately 1cm across. I needed to channel this light somehow into an area approximately 4mm in diameter.

I tried several methods for building a suitable reflector/collimator, including dis-assembling and removing elements from various LED flashlights, and even building a simple light-pipe from acyclic rod.


In the end, I decided I was over-thinking it and decided to do something drastic.

Something drastic
I decided to remove almost the entire optic path. No mirrors, 1 lens. If you compare the above picture with the second picture I posted, you can see the portions of the optic path (and plastic)  that I removed. All that I left was a simple lens in front of the splitter/reflector portion of the DLP. Coincidentally, the lens in front was approximately 1cm across, which meant the LED was a good fit.

I taped over the lens while removing plastic

Most of the optic path removed.


 What I ended up doing was (temporarily) taping the 10W UV LED directly to the face of the lens prior to the DLP's splitter/reflector. This acted as a last-stage collimator to focus the LED's light onto the DLP chip and through the optics.

Projected onto a sheet of white paper.

A little light leakage around the edges can be fixed...
 Overall, I'm fairly happy with the way this turned out. The light emitted through the DLP was strong enough to cure resin (more timed tests are required) and it has even light across the image. The LED is was using was completely un-heatsinked, so it became very hot very quickly.

The next order of business is as follows:
1) Heatsink the LED (probably with a fan)
2) Build a mount for the DLP assembly / heatsinked LED

I'm currently designing a FDM 3d-printed 'carrier' right now.
Stay tuned for part 3, which will include some curing times and the initial design of a pico-SLA machine.
-Steve

Thursday, November 14, 2013

Creation Workshop Version 13 - Last BETA release

This is probably the quickest turn-around I've had between releases. Version 13 doesn't have anything earth-shattering in it, but it does have the following:
  • Fixed all reported issues in version 12
  • Improved Camera Controls (Thanks Shai!)
  • Huge reduction in memory usage
  • Instant Slicing
  • Volume & Cost Estimator
  • Revised future-proof config files
  • Additional support generation tools
  • Fixed the intersection issues in support generation & object selection
  • Simplified GUI (G-Code controls)
  • New Plug-In System
  • Other things I forgot...

Now that I look at the list, this release actually does have quite a bit to offer. You can download version Beta 13 from the usual spot here: https://github.com/Pacmanfan/UVDLPSlicerController/tree/master/UVDLP/Published

Sunday, November 3, 2013

One Step Back, 2 Steps Forward

      So, I've been doing a lot of printing on my 3d UV DLP printer lately, making little tweaks here and there. A few months ago, my friend Tristram Budel http://3dprinterplans.info/tag/tristram-budel/ was kind enough to send me one of his high-quality machined build vats. The frame of it is machine from a solid piece of aluminum, and he uses (I believe) FEP sheets to coat the vat bottom. He also uses a thin piece of borosilicate glass http://en.wikipedia.org/wiki/Borosilicate_glass

      I've been printing increasingly larger models on my 3d printer, and I think I hit a limit. As some of you know, the amount of force required to 'peel' a slice of a model off of the bottom of a vat can require a tremendous amount of force. Unfortunately, it was too much for the vat, and the borosilicate glass bottom broke, showering resin all over my mirror, projector & electronics, ugh...

The Remains of the vat
      After a lengthy process of cleaning up spilled semi-hazardous resin, I began to plan on how to fix it. I located several EBay auction for borosilicate glass. Most of these auctions were selling panes of glass that act as a stable build surface for FDM printers.http://www.ebay.com/itm/Borosilicate-glass-for-RepRap-3D-printers-214mm-x-200mm-x-3-3mm-/321241665891?pt=LH_DefaultDomain_0&hash=item4acb7ed163

      Borosilicate glass is used for it's optical transmission properties. Shown here is a few comparisons between several types of glass http://www.sinclairmfg.com/datasheets/optical3.html . Ultimately, I decided to take a chance. Instead of shelling out 25$ for a pane of glass, i decided to use a 5mm thick piece of polycarbonate plastic (Lexan)  that I had laying around from another project.

Polycarbonate - aka - 'bulletproof glass' or 'Plexiglass' has fairly decent transmission properties. It does NOT transmit deep UV, but it looks like right around 390nm or so it starts.
Spectral transmission for polycarbonate

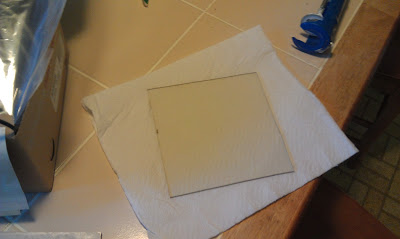
Polycarbonate pane 155x155mm x ~5mm

      I knew that I was going to need a vat coating, I went ahead and ordered a few samples of FEP sheeting from CS Hyde http://catalog.cshyde.com/viewitems/films/fep-pfa-clear-ptfe-film?&bc=100|1002 . I ordered 1 sheet that was self-adhesive and 1 sheet that was not.
Taking a picture of  sheet of plastic is difficult at best...
The aluminum frame and walls all cleaned off, ready for a replacement
      I replaced the broken borosilicate glass with the plexiglass pane. I decided to use the FEP sheet that had the self-adhesive and I immediately regretted the decision. As soon as I peeled the FEP from the backing, it curled up and stuck to itself. It took a little doing to get the FEP properly placed on the plexi, and even then I was plagued by bubbles. Of course AFTER the fact, I did a little research on how to properly put down adhesive-back sheets (stickers, window tinting, etc...), so maybe next time, I'll have a little better luck, or use the non-adhesive version.

      I added in a generous amount on silicone sealant, and remounted the vat back on my machine. I was initially concerned that the plexi might block more UV light than the original, but after a few test prints, I was fairly convinced that there was no significant difference to the optical UV transmission for the lamp I was using.

All back in working order

     One new feature I added to my printer was a peristaltic pump (http://en.wikipedia.org/wiki/Peristaltic_pump) that I ordered from China. It was originally intended as a small aquarium medication pump. At first I was wondering how I was going to control this feature through Creation Workshop. Should I add a motor driver section? Should I have the controls automated? What G-Code could control this? In the end, I realized that I was completely over-thinking this, and I added a simple DPDT (double pole - double throw) switch connected to a 5v power supply. This allows me to control the direction of the pump. 


      I drilled 2 holes in the cap for the resin. The tube went through one hole in the cap, and the other hole is used for venting. I used a small fuel-line hose that I bought from an auto-parts store to extend the short hose of the pump. I also used a few short segments of brass tubing to connect the various hose lengths together, and to act as weights for the end of the hoses.  I did a few tests with some water and a few glasses to verify that the pumping system was working properly. The flow rate was good, no leaks, everything looks like a go!


     I mounted the peristaltic pump system in my printer. I used the word 'mounted' a little loosely here. It's actually just wired into the power supply and placed in the area that I want it. I did a few tests pump resin in and out of the vat and back into the bottle. It looks like everything is working well. Now I don't have to detach my vat to drain it, or use a syringe or funnel to get the resin back in resin container. In the next day or so, I'll probably FDM print a mount plate for the switch and pump and zip-tie a few cables.
The only thing I would change about this set-up is using BLACK tubing. I'm concerned about light curing leftover resin in the tube. Instead of changing everything, I may either spray-paint the tube, or wrap some tape around it to block out light.
I can use the fill/drain tube to add/remove resin from the vat

I would HIGHLY recommend getting a cheap peristaltic pump, a length of tubing and a switch to make your own system.

More to come later.
-Steve


Saturday, November 2, 2013

UV DLP Pico Projector Experiments Part 1

      I briefly mentioned in one of my last posts about ordering and receiving a pico projector to experiment with. I obtained a re-furbished  AAXA P2JR directly from their webite http://www.aaxatech.com/products/p2jr_pico_projector.html  . 

The victim
      It came with the usual accessories, power adapter, micro-VGA to VGA adapter, composite cables, etc... My intent in ordering this is to see if I can adapt it for use in a bottom-up (or top-down) UV DLP 3d printer. I was a little nervous for several reasons. Normally, I don't just purchase new pieces of technology for the sole purpose of ripping them apart, but I figured I needed to break a few eggs to make an omelet.
       I was hoping that this projector would 'just work' and be able to cure resin without any modifications, but I pretty much figured it was going to need some mods. After powering it up, connecting it to my computer, and projecting silly images across my walls, cats, and girlfriend, I decided to get down to business. I ran my latest development code of 'Creation Workshop', sliced up a model, and chose a nice slice to test with.

Initial resin test
      I put a few drops of UV resin in a plastic sandwich bag, laid it flat, and projected an image slice. It went pretty much how I figured. After about 30 seconds, I checked the bag, and to my disappoint (but not surprise) I saw that it had failed to cure the resin in the slightest. 

      Now, I have it on good source that at least one person in the community has been able to modify a pico-projector for UV DLP purposes, so I wasn't ready to give up yet. I began to prep the patient for surgery.
Back cover off


The green and blue cable goes to the DLP unit's LEDs


A flat ribbon cable connects the DLP to the main board

     I was kinda nervous taking this all apart. What if I break it? What if I nick off a resistor? Am I about to lose 169$ bucks? Well, I hit my stride, and decided to make some progress in the name of science. I was able to completely dis-assemble the projector into it's essential components, the case, the speaker, the battery, the main board, and the DLP unit which was attached to a hefty heat sink.

I gently lifted the little bar that held down the ribbon cable to remove the DLP. After freeing the DLP from the main board, I had a better chance to examine the actual DLP projector without fear of tearing the ribbon cable.

Note the blue/green wires, L-bracket and copper heatsink

Initially, I was a little puzzled by the 2 sets of 4 wires. 

A good view of the optic-path

At the bottom/left of the picture, you can see the L-Bracket, each side has a 4-wire lead. Light is being projected in from 2 sides - each at a 90 degree angle from each other. Notice the funny-looking bluish glass (it's important later).

I figured that the L-Bracket contained the LEDs, and that I was probably going to have to replace them with a better UV source. I carefully sliced through the black rubbery epoxy holding the LED L-Bracket to the side of the DLP Unit.

The removed Led bracket 

I examined the LED L-bracket and noted that 1 led was marked R/B and the second was marked G. Without getting TOO much in theory about how DLP projectors work, I wanted to make a few comparisons between Color-wheel types and LED types.

In a Color-wheel type of DLP projector, a light source is projected through a spinning color wheel. The wheel has an encoder mechanism that tells the control electronics which color the light is currently projecting through. The appropriate color mask is displayed on the DLP micro-mirror array.

In a LED-type projector, either 1, 2, or 3 LEDs are used. Since LEDs can quickly turn on/off, the control electronics will turn on a single color, the DLP chip will display the appropriate mask-image for that color, and the process is repeated for all colors.


An image I found that explains the optic path 
The above image is NOT a picture of my DLP device, but serves to show the portions of the optic path. My optic path is a little different, but has very similar elements. 

Light from LEDs shine through collumnating optics. Dichroic mirrors (http://en.wikipedia.org/wiki/Dichroic_filter) reflect a specific frequency of light through a fish-eye lens, reflect on a right angle, then pass through the DLP portion and out the projection lens.

I knew that the dichroic mirrors were going to be a problem. They only allows a very narrow bandwidth of light through. 

I went ahead and took out the dichroic mirror reflectors and replaced it with a single FSM (Front surface mirror). This essentially blocked off 1 light path, which was alright, because I'm only going to use 1 light path for a UV led.

I've got a bit more to say about this and a few more results, but I'm going to save it for part 2.
Stay tuned.
-Steve


Monday, October 28, 2013

Creation Workshop Beta 12 is out!

It's been a long time coming, but I just released Beta 12 of Creation Workshop. There are far too many new features to start listing off, but I'm going to try:
  • Improved UV DLP Slicer
  • Export to zip file or sub-directory
  • Support generation (automatic and manual)
  • Ability to reload previously sliced models
  • New machine configuration screen
  • New slicing profiles configuration screen
  • Support for FDM printers using Slic3r to slice
  • Serial projector control
    • ability to add new projector commands
  • 30% faster rendering
  • New User manual 
  • Improved move/scale/rotate controls
    • ability to drag around objects with mouse and shift key
  • Everything else I forgot...

You can get it from the usual spot here: 


I'd love to hear about any constructive feedback / feature requests / bugs. Help me make this a great piece of software, and don't forget to donate :-) 
-Steve

Saturday, October 19, 2013

More Pix

I took a few more pix and video of my machine in action. I was able to get a few more prints off the machine when it broke again.

My machine fell victim to UV resin-dissolving ABS-eater again. 
The 'before' pic

Some of the aftermath

I rebuilt the Z-Axis Build-Arm.
I used some 5mm aluminum plating I had laying around to re-build the z-axis build arm. I added some 5mm bolts with double nuts on the bottom to help adjust the build plate to parallel with the vat. Wingnuts tighten down the top.


Gender-bending required.
 I'm adding some basic serial control of the projector through an open serial port. I purchased a small F-F gender bender and started some programming. Instead of simply hard-coding some commands to control my projector, I took a more universal approach that allows the user to create new commands, give it a name, and assign a hex string to send to the projector.


The relocated power panel.
 I moved the power panel from the back of the machine to the side panel. I plan on adding another small panel for connection to the USB hub connected to the usb/serial connector to the serial port of the projector. I also have the Arduino connected to another port on the USB hub.

Goldberg Sphere. 50 micron accuracy Z, 100 micron X/Y, Dimensions are 15x15x15mm


I had a few more good prints out of my machine before it died again. I am very proud of the resolution attainable.


The rear bearing holder piece broke. I was sloppy with my dripping resin.
I really need to take more care and caution in dealing with chemicals. I've damaged several ABS printed parts to UV Resin. I printed another rear bracket. I just may soak it in UV resin and cure it to create a meta-material part.

The weird part about these parts dissolving is that they simply crumble into pieces. I've treated many ABS parts with acetone vapor, and parts simply 'Melt' a bit like cheese or butter, to smooth and harden parts. This UV Resin must be destroying the long CH bonds from the polymer molecules in the ABS. I think if I want to try a chemical UV bath and curing session for an ABS part, I should do it quickly before the ABS has a chance to break down.

 I'm already ordering parts for the next version of the printer. I'm going to name this version the "Mark I". The 'Mark II' version will have a much smaller projector that I recently ordered http://www.aaxatech.com/products/p2jr_pico_projector.html . My plan is to make a z-axis with a single linear rail and simplified build plate/vat design.

I also ordered a peristaltic pump. My plan is to have a simple forward/reverse switch connected to the pump to control the flow of resin in/out of the vat. 

We'll see what the next iteration of the machine will hold. For now, I'm going to fix my machine, keep printing, and improve my "Creation Workshop".

Wednesday, October 16, 2013

A Win, a Failure, and another Win?

Warning: This is going to be a pic-heavy post.

The success

So, as many of you know, I've been working hard on my software -"Creation Workshop", preparing for the next Beta 12 release. I've finally found some time to re-build my UV DLP machine to produce some proper prints. Last night, I made a few successful test prints on my newly re-designed machine.

Shown here is the newly- redesigned machine.
My previous setup had issues with the stability of the Z-Axis. It had too much wobble and play in the z-axis, and this was causing issues with separating the model from the vat, as well as creating z-artifacts. As you can see, the Z-axis has been completely rebuilt with 1010 T-Slot aluminum extrusions. 
I folded the geometry of the machine. The projector is now laying horizontally, and I use a FSM (Front Surface Mirror) to project the image onto the surface of the vat. The new Z-Axis is rock solid. Also featured on this machine is a tilt mechanism which helps separate the model from the PDMS coated vat every layer.

A top-down view of the Vat tilting mechanism.

I took the time to install a limit switch for the Z-Axis, so I know when the build plate is exactly touching the bottom of the vat. I used the X-Axis to control the tilting mechanism, and placed a limit switch for the X-axis to trigger when the vat was perfectly level.

Now, I can use homing for the X&Z axis's to move the machine into the initial position.

After a bit of fiddling, a code change, and a ton of calibration and dry runs, I decided it was time to make a test print. I chose the 'Tardis' model.

My first 'Successful' print.

I had a mechanical failure at the last few layers, but overall, it was a good print. I'm still going to need to fine-tune my layer times and Z/X axis movements.


The Failure

I'm always a believer that a failure can teach far more than a success. My machine definitely failed in an un-expected way. I (re)built  most of my Z-Axis using 1010 T-Slot extrusions, however; there were a few choice FDM-printed parts in the build.

Some history
One thing I noticed a few months ago was that the 3d UV Resin I was using was EXTREMELY corrosive to ABS plastic. I had spilled a few drops of it on the tilt mechanism, and the plastic all but dissolved right before my eyes.

I had a similar failure last night. Here's a pic of the destruction:
The UV Resin dissolved the ABS

This L-Bracket as well as the printed green 3x2 plate were dissolved by the UV Resin. Catastrophic failure occurred approximately 1 hour into the print.

 
The bottom half that attaches to the build plate.

The issue is that the UV resin came over the side of the top of the build plate in the vat. It then traveled by capillary action up the ABS fibers of the green plate and the grey L-brackets. Both FDM ABS prints were dissolved and failed.

The Win?

  My initial guess is that something in the un-exposed UV resin acts as a solvent for ABS plastic. Interestingly enough, my last iteration of my z-axis had this same problem that I was able to avoid. My last Z-Axis also used a 3d-printed ABS interface plate. How did it avoid destruction?
A plate used to connect the aluminum build plate to the Z-Axis on my last machine
As I recall, last time I encountered this, I saw the UV resin was soaking into my printed plate, and I quickly used my UV Laser to cure the resin embedded in the ABS plastic. This worked out well and made the interface plate solid as a rock.

Composite materials
After the failure with the brackets and the plate last night, I re-examined the saturated - cured interface plate from my previous Z-Axis. The resin had completely become embedded and hardened within the material. After a few un-scientific 'hardness' tests with a hammer, I believe that this composite material is much harder and tougher than either ABS or the UV would be on it's own.
I may have to do some more testing with saturating FDM printed ABS plastic with UV Resin and curing the material to test durability of parts in the future.

Next Steps

My machine should be simple enough to fix. I'm going to replace the printed L-brackets with aluminum brackets. I'll probably take the time to add in a screw-adjustment for leveling and quick removal of the build plate.

I'm very happy with the results of my first printings, I think now I have a working machine to test with, adding new functionality to my 'Creation Workshop' shouldn't be too difficult.
-PacManFan

Wednesday, September 25, 2013

Another 3d FDM Printer

What's this? Another 3d FDM Printer? Well, basically yes... A little explanation is in order. When I first got my MakerBot Thing-O-Matic a few years back, I decided to create a RepRap Prusa Mendal machine http://reprap.org/wiki/Prusa_Mendel_Assembly . Unfortunately, the project never got finished and I had moved on to other things. The half-assembled frame and pieces sat in a box for a few years, but was always on my mind (I hate un-finished projects)

Lately, I've been waiting on some 80/20 1" aluminum extrusion and parts to arrive for my 3d UV DLP printer rebuild (yes, that's happening too). However, the itch to build something has been strong, so I decided to un-box my Prusa Mendal (Iteration 1) and finish it. 

Well, after reading about the numerous shortcomings of the iteration 1 Prusa design, I decided a complete rebuild was in order. Using the iteration 3 (I) design as a starting point, I made some modifications to the design, including the addition of a baseboard instead of threaded rod for the Y axis. I went ahead and designed some new y-rod holders, new endstops, a new 5mm to 3/16 coupler, Y motor mount, as well as a few other parts. 

Amazingly, I completed 90% of the build in 1 day (about 8 hours), including build the wood base, painting, and assembling. The second day (2 hrs), I wired it up. The 3rd day (last night) I attached the extruder, did some cable management, and set up the new Sprinter firmware steps per mm. 
The only remaining issues are:
1) Z-Axis endstop switch (I was designing it this morning, I'll probably print it later)
2) HBP Platform leveling.

What am I going to do with this new printer? Well, my 2 main options are: Sell it to a friend who has been dying to get one, or bring it into work under the pretense of designing / printing enclosures for the various work-related projects / products I am involved in.

As a side note, my un-released 'Creation Workshop v12 Beta' now has full support for FDM based machines. I used this to configure and test my new printer. If you're feeling bold, get my latest v12 release from Git and give it a go. I plan on releasing the latest version when I fix some support generation issues.


Update 9/26/2013 - 
Well, I got the finishing touches put on this machine, installed the extruder, leveled the bed, and finished up the end stops. I made my first successful print with it last night!